Once you have protected an Azure Function using AAD (Azure Active Directory) , these instructions allow you to securely call it from a React application (or any other javascript SPA library).
We’ll accomplish this by using the MSAL.js library for javascript.
Step 1: Create React App
Create a brand new react application using the following:
npx create-react-app auth-app
cd auth-app
npm install @azure/msal-browser @azure/msal-react
npm install react-bootstrap bootstrap
Start your application using:
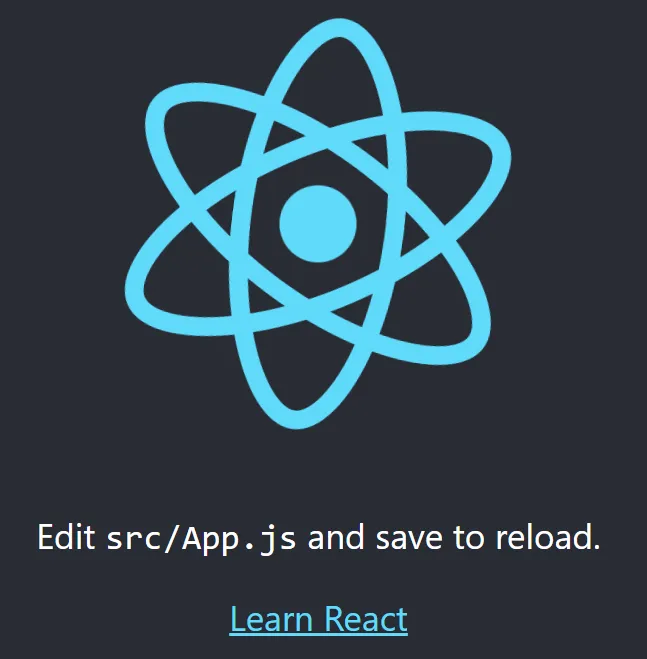
npm startYou should see an empty react application at https://localhost:3000 as follows:
Step 2: Create an App Registration in Azure Active Directory
This registration will be for your client React application. It will allow you to request an access token and have the appropriate permissions to call the Azure Function.
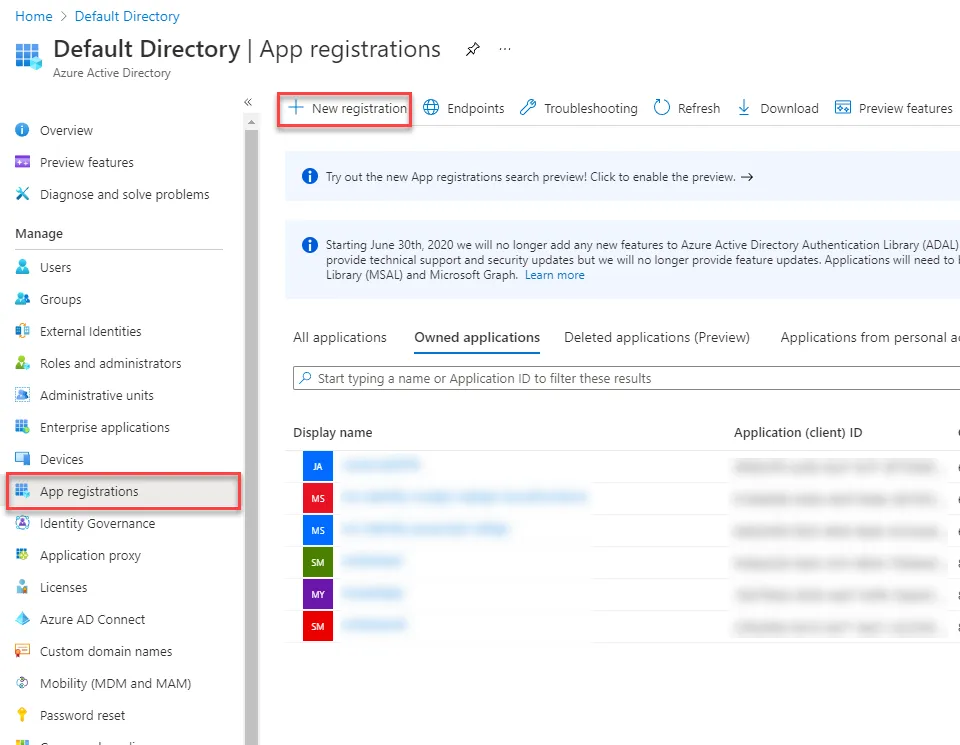
In the Azure Portal, navigate to Azure Active Directory and select New registration.
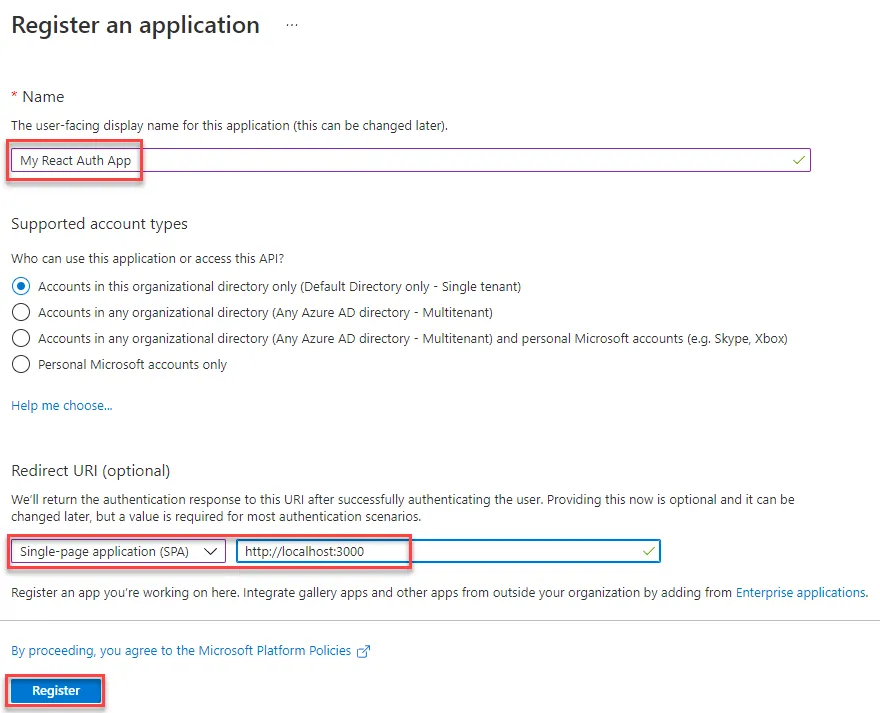
Fill in a name for your react application, select Single-page application (SPA) and enter http://localhost:3000 as your Redirect URI.
Click Register.
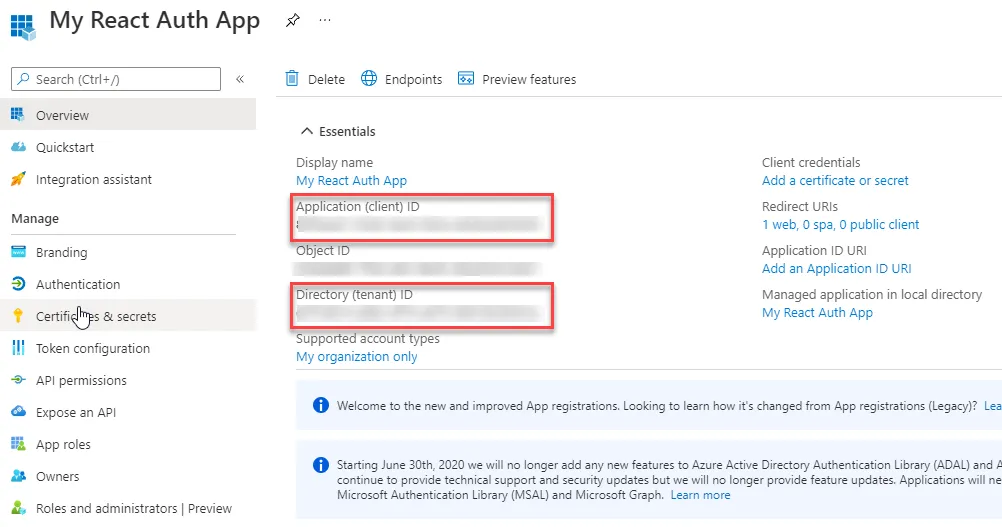
Record down Application (client) ID and Directory (tenant) ID. You will use these later.
Step 3: API Permissions
This step assumes you have already secured an Azure Function and registered it in AAD. If you have not, see this guide.
In this step we will grant your react application access to your Azure Function. The protected function for this example is called smtestauth.
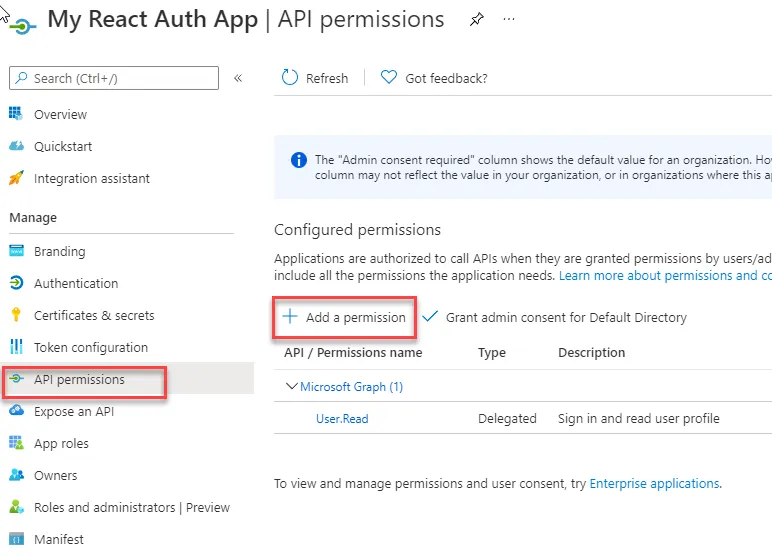
In Azure Active Direcory, on your newly create application registration (My React Auth App), navigate to API permissions and select Add a permission.
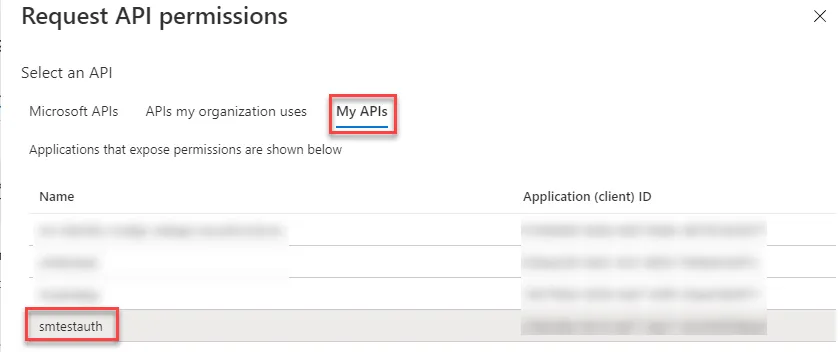
Select the My APIs tab and the secured function name (smtestauth).
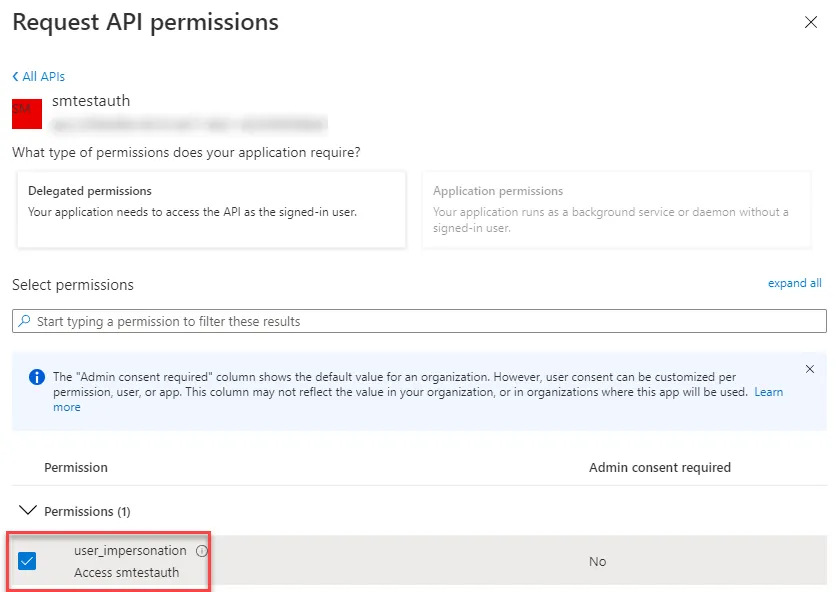
Check the user_impersonation permission and select Add permissions.
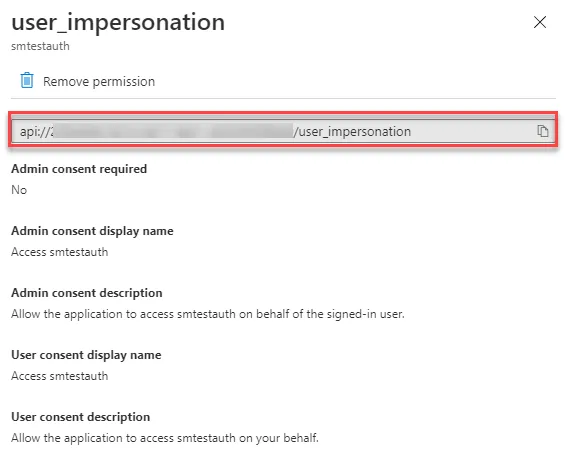
Next, click on this new permission to get the API scope:

Copy the api://xxxxx-xxxxx-xxxxx-xxxx/user_impersonation value. That will be your API scope that you will use later.
Step 4: Configure React Application
This step will configure your React application to authenticate against AAD using MSAL.js. In this example we will protect all pages from unauthenticated access.
src/authConfig.js
Create a file named authConfig.js in the src folder of your react application.
The contents of the file is:
export const msalConfig = {
  auth: {
    clientId: 'Enter_the_Application_Id_Here',
    authority: 'https://login.microsoftonline.com/Enter_the_Tenant_Info_Here',
    redirectUri: 'Enter_the_Redirect_Uri_Here',
  },
  cache: {
    cacheLocation: 'sessionStorage',
    storeAuthStateInCookie: false,
  },
}

export const apiRequest = {
  url: 'Enter_Url_of_Service',
  scopes: ['Enter_API_Scope'],
}
Substitute the following with IDs you recorded earlier:
- Enter_the_Application_Id_Here = Application (client) ID
- Enter_the_Tenant_Info_Here = Tenant ID
- Enter_the_Redirect_Uri_Here = http://localhost:3000
- Enter_Url_of_Service = URL of the Azure Function you want to call
- Enter_API_Scope = API scope recorded in last section
src/index.js
Open src/index.js and add the following imports:
import 'bootstrap/dist/css/bootstrap.min.css'
import { PublicClientApplication, EventType } from '@azure/msal-browser'
import { MsalProvider } from '@azure/msal-react'
import { msalConfig } from './authConfig'
Below the imports, add the following code:
const msalInstance = new PublicClientApplication(msalConfig)

const accounts = msalInstance.getAllAccounts()
if (accounts.length > 0) {
  msalInstance.setActiveAccount(accounts[0])
}

msalInstance.addEventCallback(event => {
  if (event.eventType === EventType.LOGIN_SUCCESS && event.payload.account) {
    const account = event.payload.account
    msalInstance.setActiveAccount(account)
  }
})
Wrap your App with the MsalProvider component as follows:
<MsalProvider instance="{msalInstance}">
  <App />
</MsalProvider>
src/app.js
Open src/app.js and replace the code with the following:
import { MsalAuthenticationTemplate } from '@azure/msal-react'
import { InteractionType } from '@azure/msal-browser'
import { loginRequest } from './authConfig'

function App() {
  return (
    <MsalAuthenticationTemplate
      interactionType={InteractionType.Redirect}
      authenticationRequest={loginRequest}
    >
      <div class="alert alert-primary" role="alert">
        Hello, I am authenticated.
      </div>
    </MsalAuthenticationTemplate>
  )
}

export default App
View your app at http://localhost:3000, it should redirect you to AAD for login. Once you have been authenticated you should see:

If you do not see the above, double check the authConfig.js values.
Step 5: Obtain Access Token
To call a secured Azure Function, we first need an access token.
src/apiCall.js
Create a file named apiCall.js in the src folder of your react application.
The contents of this file is:
import { apiRequest } from './authConfig'
import { msalInstance } from './index'

export async function bearerToken() {
  const account = msalInstance.getActiveAccount()
  if (!account) {
    throw Error(
      'No active account! Verify a user has been signed in and setActiveAccount has been called.'
    )
  }

  const response = await msalInstance.acquireTokenSilent({
    ...apiRequest,
    account: account,
  })

  return response.accessToken
}

export async function apiCall() {
  const token = await bearerToken()

  const headers = new Headers()
  const bearer = `Bearer ${token}`

  headers.append('Authorization', bearer)

  const options = {
    method: 'GET',
    headers: headers,
  }

  return fetch(apiRequest.url, options)
    .then(response => response.json())
    .catch(error => console.log(error))
}
Replace the contents of App.js with the following:
import React, { useState } from 'react'
import { MsalAuthenticationTemplate } from '@azure/msal-react'
import { InteractionType } from '@azure/msal-browser'

import { apiCall, bearerToken } from './apiCall'

function App() {
  const [accessToken, setAccessToken] = useState(null)

  const getAccessToken = async () => {
    const token = await bearerToken()
    setAccessToken(token)
  }

  const callApi = async () => {
    apiCall()
  }

  return (
    <MsalAuthenticationTemplate interactionType={InteractionType.Redirect}>
      <div className="alert alert-primary" role="alert">
        Hello, I am authenticated.
      </div>

      <hr />

      <div>
        <button
          type="button"
          className="btn btn-primary"
          onClick={getAccessToken}
        >
          Get Access Token
        </button>
        {accessToken && <div>Access token is: {accessToken}</div>}
      </div>

      <hr />

      <div>
        <button type="button" className="btn btn-primary" onClick={callApi}>
          Call API
        </button>
      </div>
    </MsalAuthenticationTemplate>
  )
}

export default App
Run your react application, you should be able to retrieve an Access Token and display it:
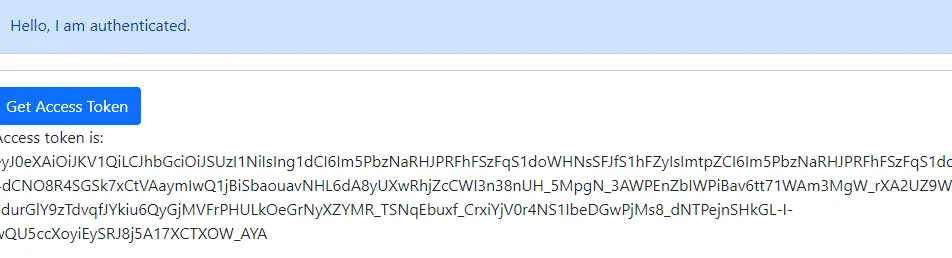
Clicking Call API should display the results of your Azure Function (assuming it returns a simple string):

Troubleshooting
As you can see, there are a lot of steps with the above configuration. Below are some common issues that I’ve had setting up secured applications.
401 Unauthorized
If you are receiving a 401 Unauthorized response calling the API, check your function is actually anonymous in code. You have protected the Azure Function already via the portal and you may have inadvertantly applied 2 layers (function keys) as security.
e.g.
public async Task<IActionResult> Location(
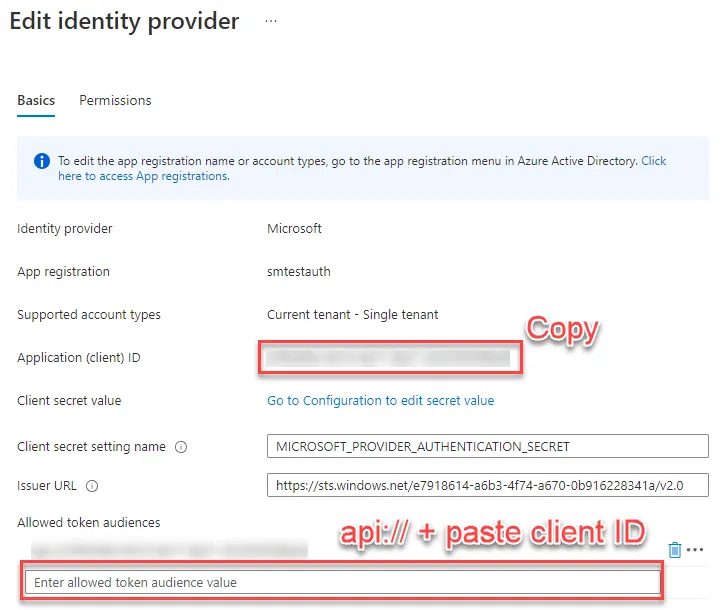
[HttpTrigger(AuthorizationLevel.Anonymous, "get", Route = null)] HttpRequest req)Alternatively, your token might not be a valid audience (AUD). You can check Allowed token audiences by navigating to Azure Function -> Authentication -> Edit Provider:
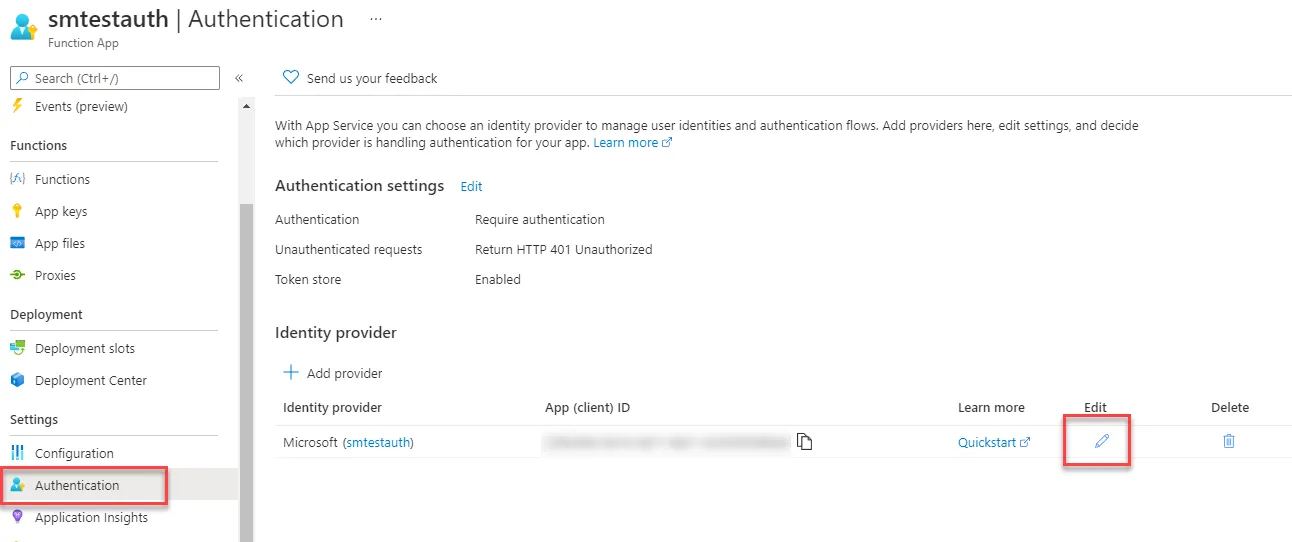
In Allowed token audiences, add api://Enter_your_client_ID and click save.